How Reserrva works: from your shop to the first booking
A customer asks whether you have a slot tomorrow. Instead of going back and forth about who is working, which service they want and what time suits them, you send a link. They choose an appointment. You see it in your agenda.
That's the everyday job Reserrva is built for. Barbershops and tattoo studios get a booking page and a workspace for their team. Customers book from their browser, without creating an account or downloading an app.
This guide walks through both sides, from setting up a business to keeping the confirmation after a booking. If you're joining someone else's team, you don't need to create another shop: start with the invitation section.
The screenshots use demonstration businesses and example data, not customer records. Some show the English interface and others Spanish; the booking flow is the same. You can open each screenshot at full size.
1. Set up a business that reflects how you work
Business owners start by signing in to Reserrva. You can use Google or request a sign-in link by email. Customer bookings use a separate, account-free flow; this login is for the people running the business.
Choose barbershop or tattoo studio, then enter the business name, country and contact number. If you work independently, a one-person business is enough. You still get your own public page and shareable link.
Address, opening hours and your own profile
Add the address customers should visit. Start typing to find a Google address suggestion, check that it matches your premises and select it. You can also enter the address manually. A place name that sounds right is not enough: check the street and city before moving on.
Set your opening hours to match the times you actually take appointments. The country supplies the initial currency and time zone, so check those settings too, especially if your business is in a region with a different time zone.
Next, add the name customers should see for you. If you also take appointments, include yourself as a bookable professional. If you only manage the shop, use the management-only option. Being the owner doesn't have to mean appearing in the list of people customers can book.
Invite now, or come back to it
The team step is optional. Add colleagues' email addresses if you're ready. Otherwise, choose Skip for now and invite them from the dashboard later. A solo professional doesn't need to invent a team to finish setup.
Put your actual services on the price board
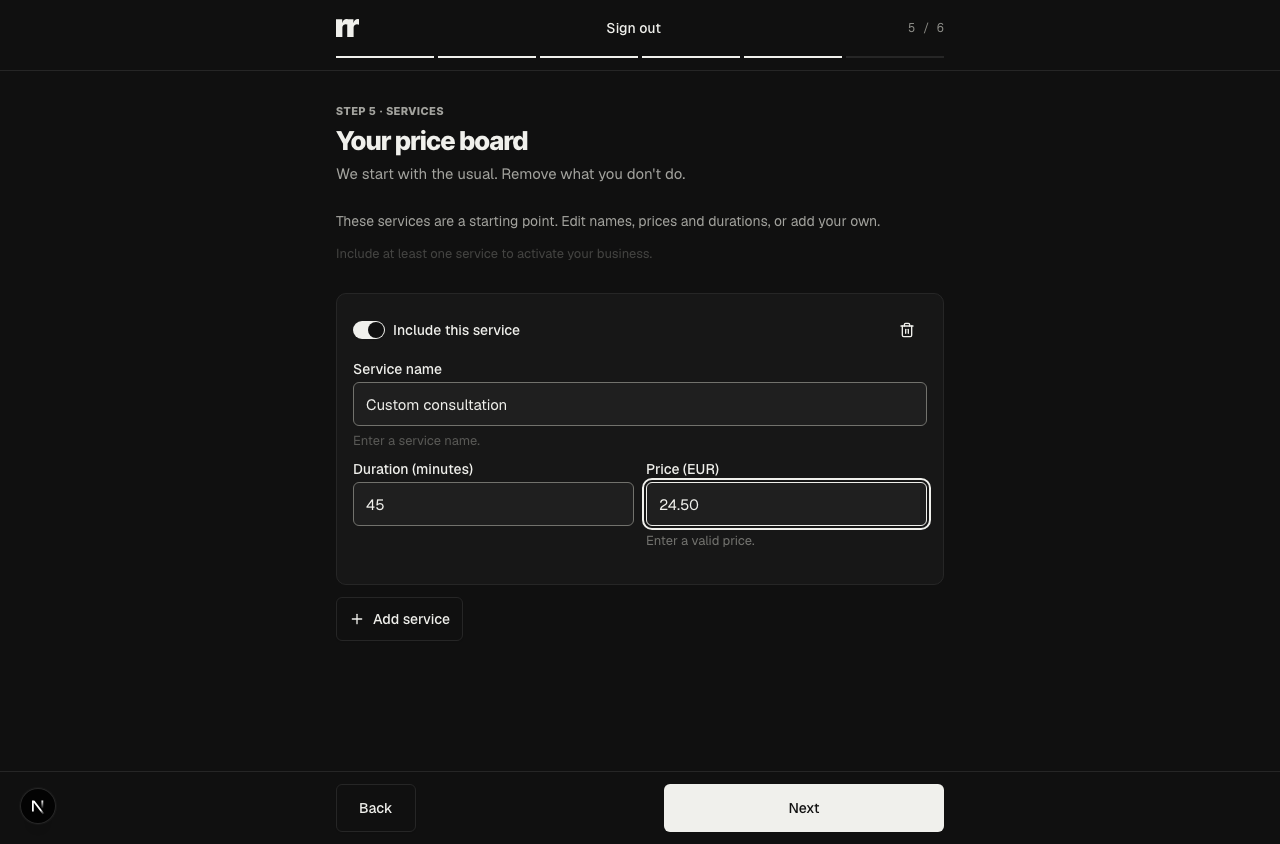
The suggested services are a starting point. Keep what you offer, remove what you don't and add your own services. For each one, check the name, duration and price. Duration matters: a service that takes forty-five minutes should not be listed as thirty just because that was the default.
Use names a customer will recognise. “Haircut and beard” is clearer than an internal package code. A tattoo studio can list a consultation or a clearly defined service without pretending that every custom project has the same price and duration.
Finally, review the summary and activate your business. Check the address, hours, professionals and services before sharing the page. Those details determine what customers can book.
2. Your booking link is ready to share
After activation, the success screen hands you the business booking link. Copy it, use the share action or open the page to see it as a customer would. You don't need to build a separate website first.
Put this link somewhere people already look: your Instagram bio, a WhatsApp conversation or your existing website. Send the business link when the customer should choose from the team. Send a professional's personal link when they specifically want that barber or tattoo artist.
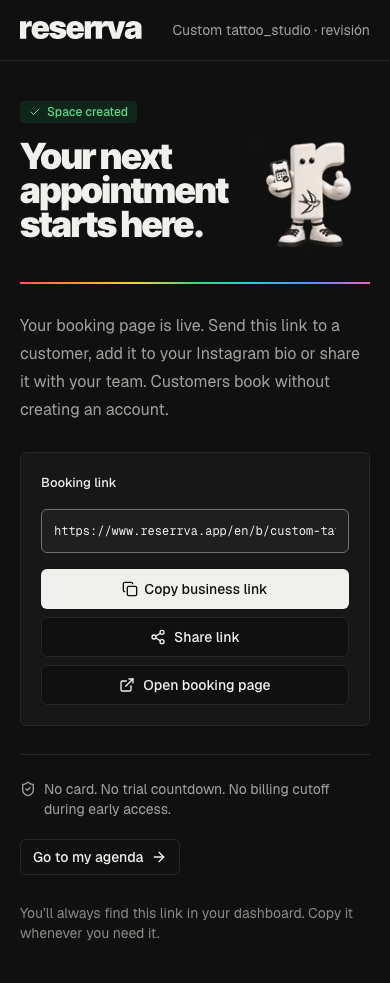
You can find the business link again in the dashboard, with a copy control. Professionals also have their own booking link on their profile. The link to book an appointment and the link to join your team are different: customers need the booking link, not an invitation.
You can start with barbershop signup or tattoo studio signup. Check current pricing for access and billing terms rather than relying on a screenshot of an earlier offer.
One calendar for the whole team
Reserrva keeps services, staff and manual appointments in a single panel, and tracks availability for each barber separately.
Create my barbershop/en/onboarding?kind=barbershop3. Invite a colleague—or accept an invitation
Owners and managers can invite colleagues from Team. Invitations can be sent by email, but email isn't the only way to deliver one. You can copy the invitation link and share it through WhatsApp or another messaging app.
The invitation is tied to the email address it was created for. Forwarding it doesn't turn it into an open invitation for anyone who has the URL.
For the person joining, the sequence is:
- Open the invitation link.
- Sign in with the invited email address if you're not already signed in.
- Return to the invitation and accept it.
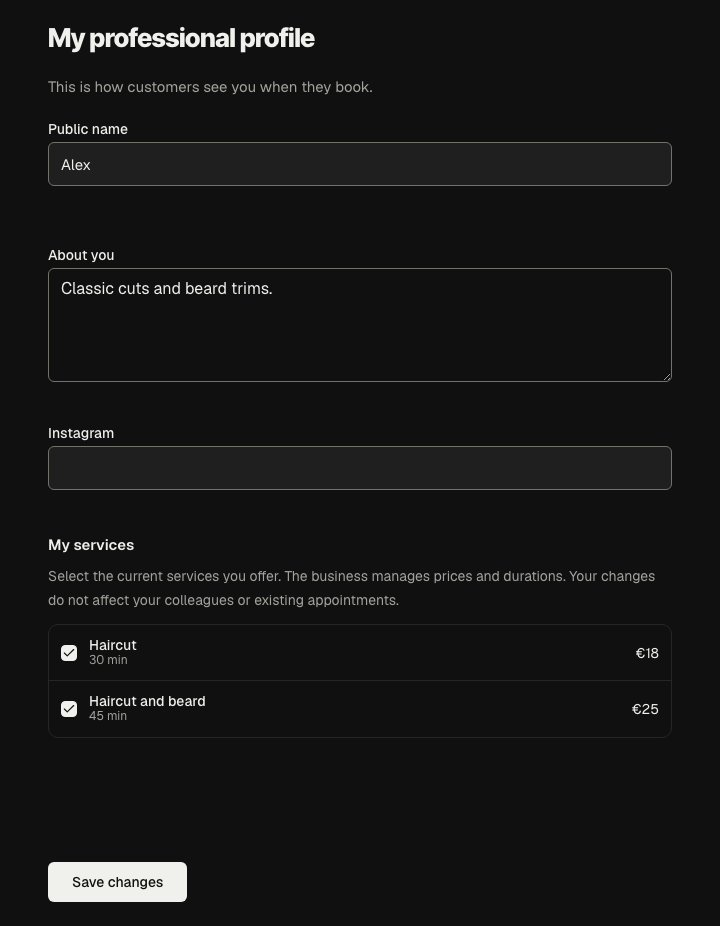
- Complete your professional profile and check the services you offer.
If you already have a Reserrva account, use that account when its email matches the invitation. You don't need another account just because you're joining a team. If you're signed in with a different email, switch accounts rather than starting a new business to work around it.
Your public name is what customers see when choosing a professional. Check it, write a short bio if useful and select your services. The business manages prices and durations; your service selection tells customers what they can book with you. It doesn't edit your colleagues' profiles or rewrite existing appointments.
If a link has expired or an invitation was withdrawn, ask the person who invited you for a new one. Don't post team invitation links publicly alongside your customer booking link.
4. What a customer sees when booking
Customers open the business link you share, or a professional's personal link. You might send it in a message or put it in your social profile. This guide uses direct links; it doesn't depend on a public search directory being available.
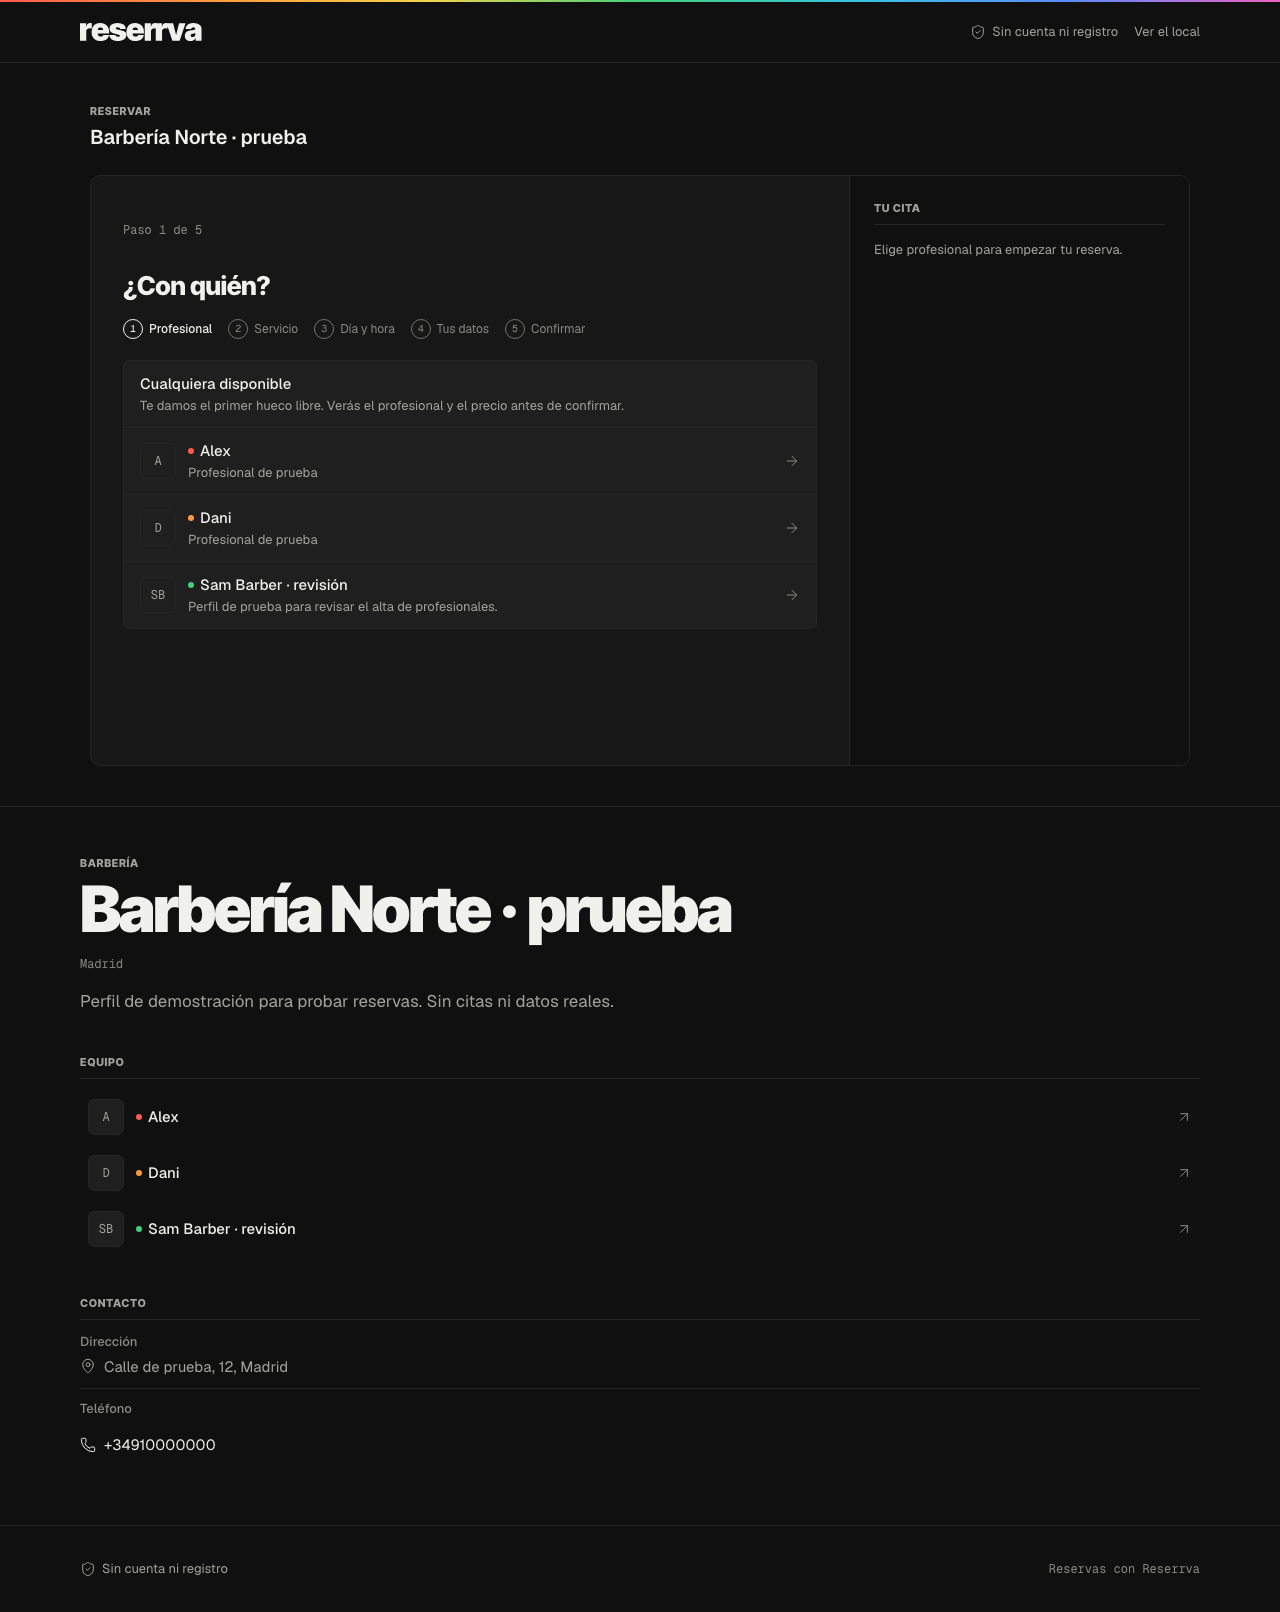
On the business page, booking starts with the professional, followed by the service, day and time, contact details and a final review.
Choose the professional, then the service
Pick a barber or tattoo artist, or choose Any available if you don't have a preference. You'll see the assigned professional before confirming. This means an eligible professional with availability, not an arbitrary person who doesn't offer the service.
If there's only one eligible professional, or you arrived through a professional's own link, the flow may go straight to services. You haven't missed a step: the professional is already chosen.
Choose the service and check its duration and price. For tattoo work, be precise about what you're booking. A consultation reserves time to discuss a project; it isn't an agreement on a finished tattoo, its final cost or the number of sessions. If the work needs a quote, contact the studio instead of booking an unrelated fixed-price service to get into the calendar.
Pick a day and an available time
Choose a day, then a time. Where relevant, slots are grouped into morning, afternoon and evening. Taken times are disabled rather than offered as bookable appointments.
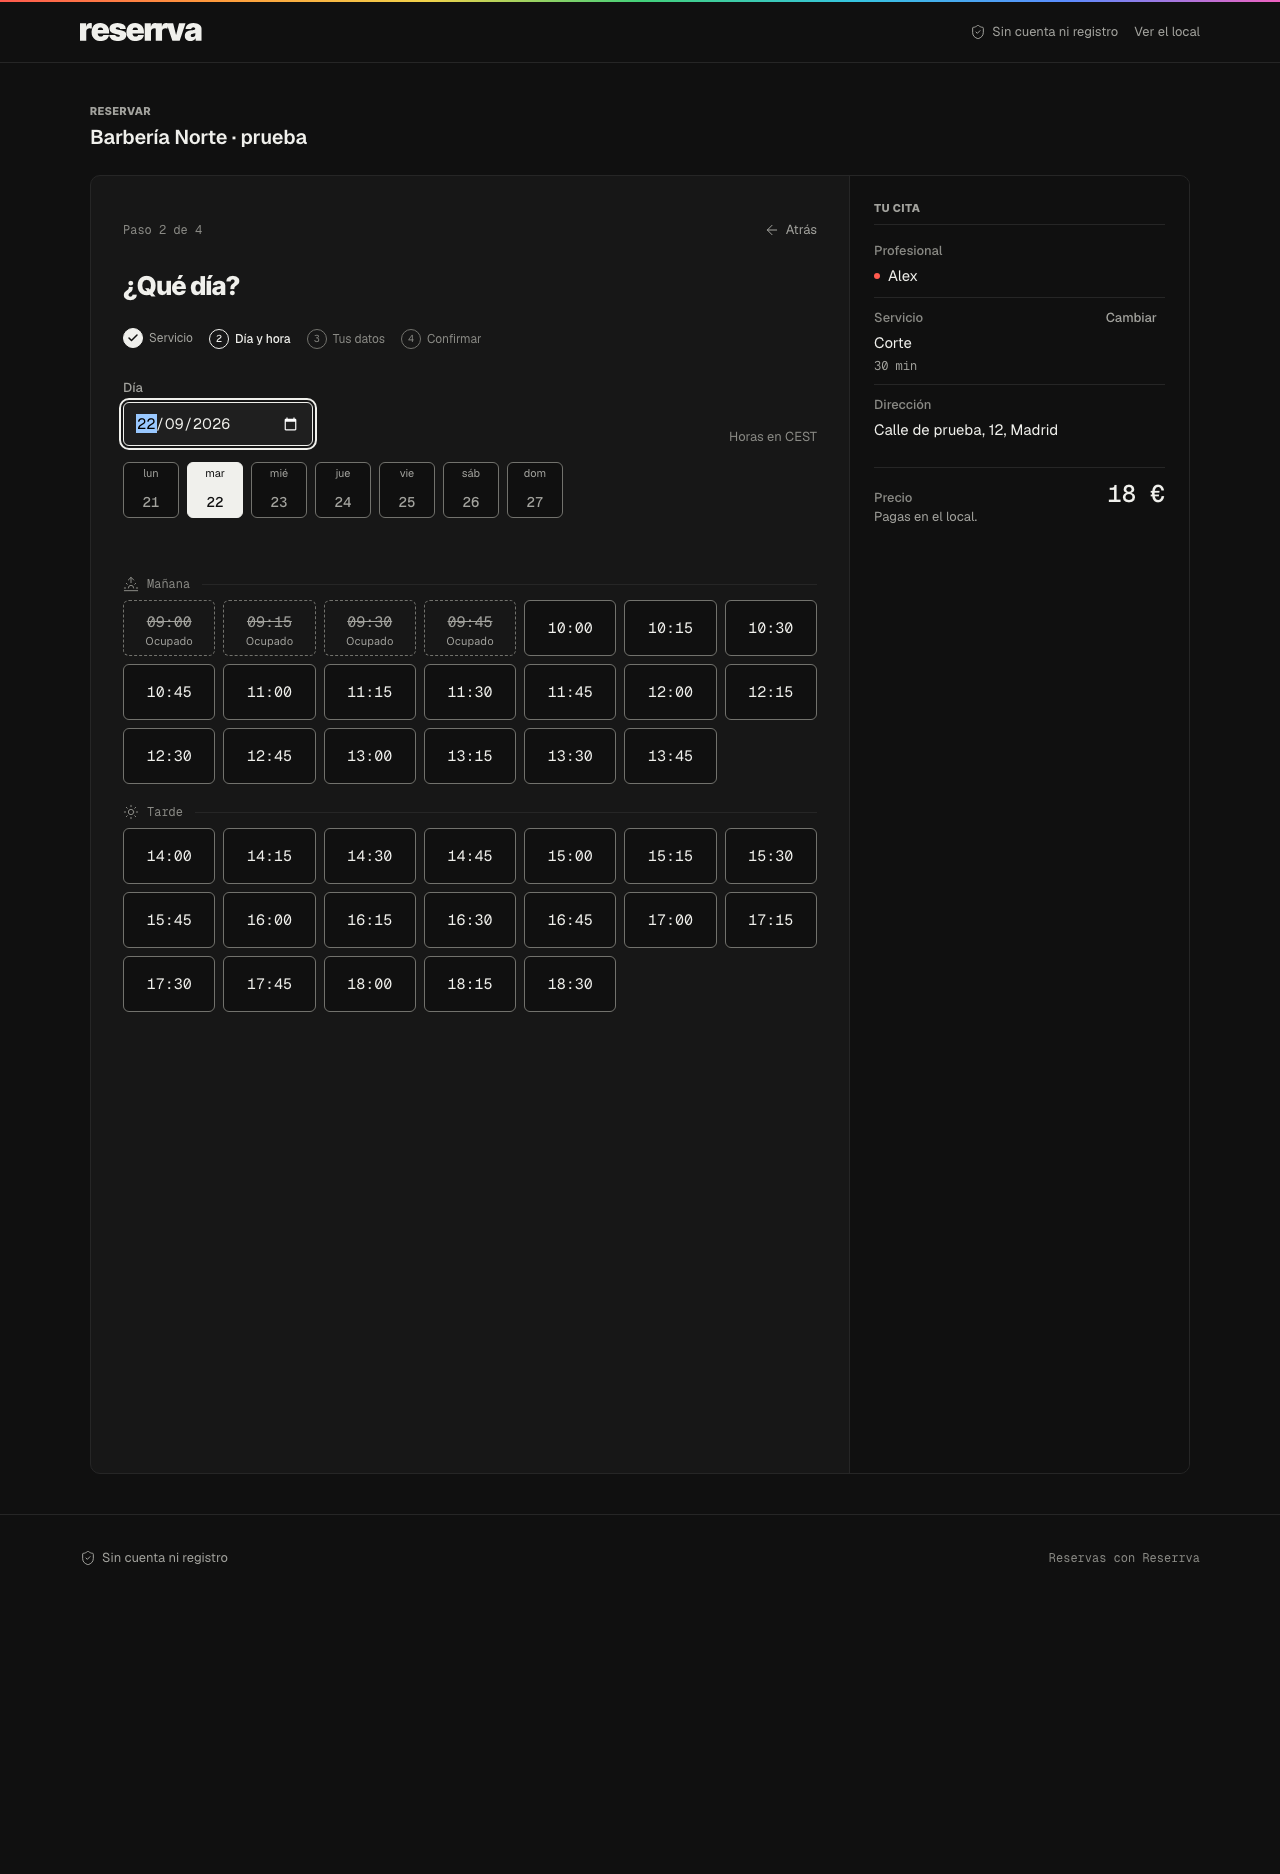
If no suitable time appears, try another day or professional. Check the time-zone label, especially when booking while travelling. The receipt also shows the venue time when it differs from your device's time zone.
Enter your details and review
Add your name and phone number, plus any other details the form asks for. You can choose to remember your contact details on that device so you don't have to type them again next time. That's browser storage, not a Reserrva customer account. Leave it unchecked on a shared device.
Review the professional, service, date, time and price before confirming. Selecting a slot isn't the same as completing the booking: if someone else books it first, choose another available time.
Keep the receipt
Read the status on the result screen. Confirmed means the appointment is confirmed. Awaiting confirmation means the business still needs to confirm it; don't treat the two as interchangeable.
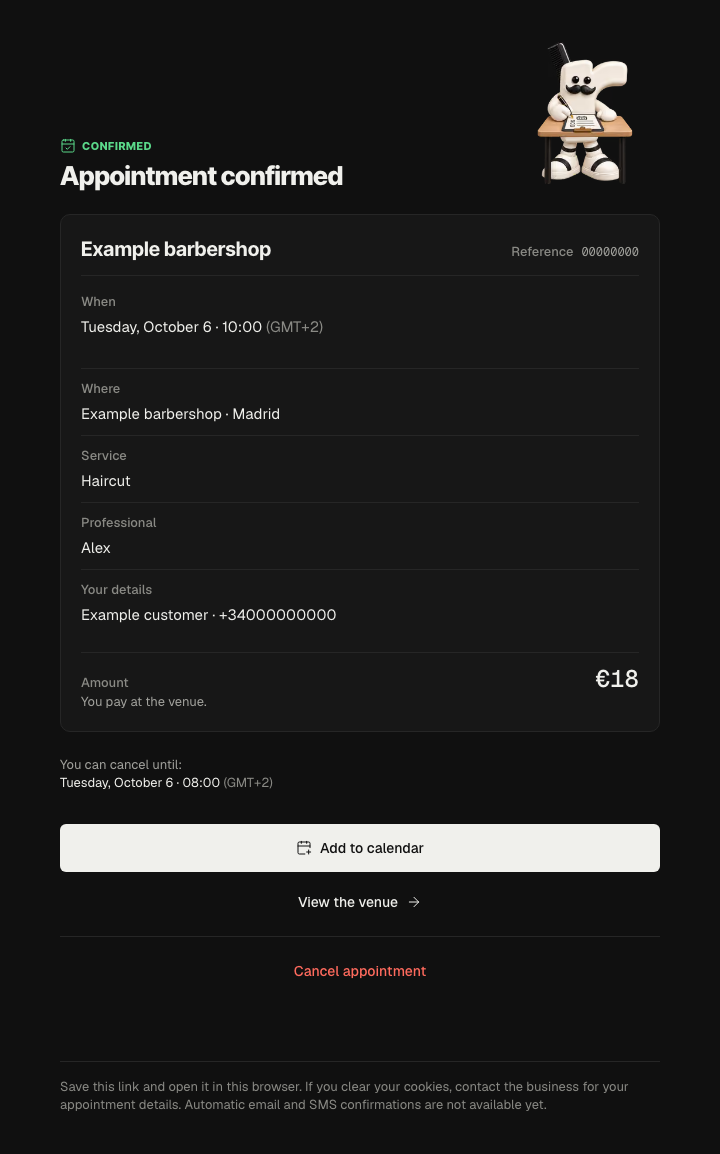
From the receipt you can add the appointment to your calendar, open the venue page and, when contact information is available, contact the venue. Cancellation is subject to the business's deadline, shown with the appointment.
5. Keep the working day in the agenda
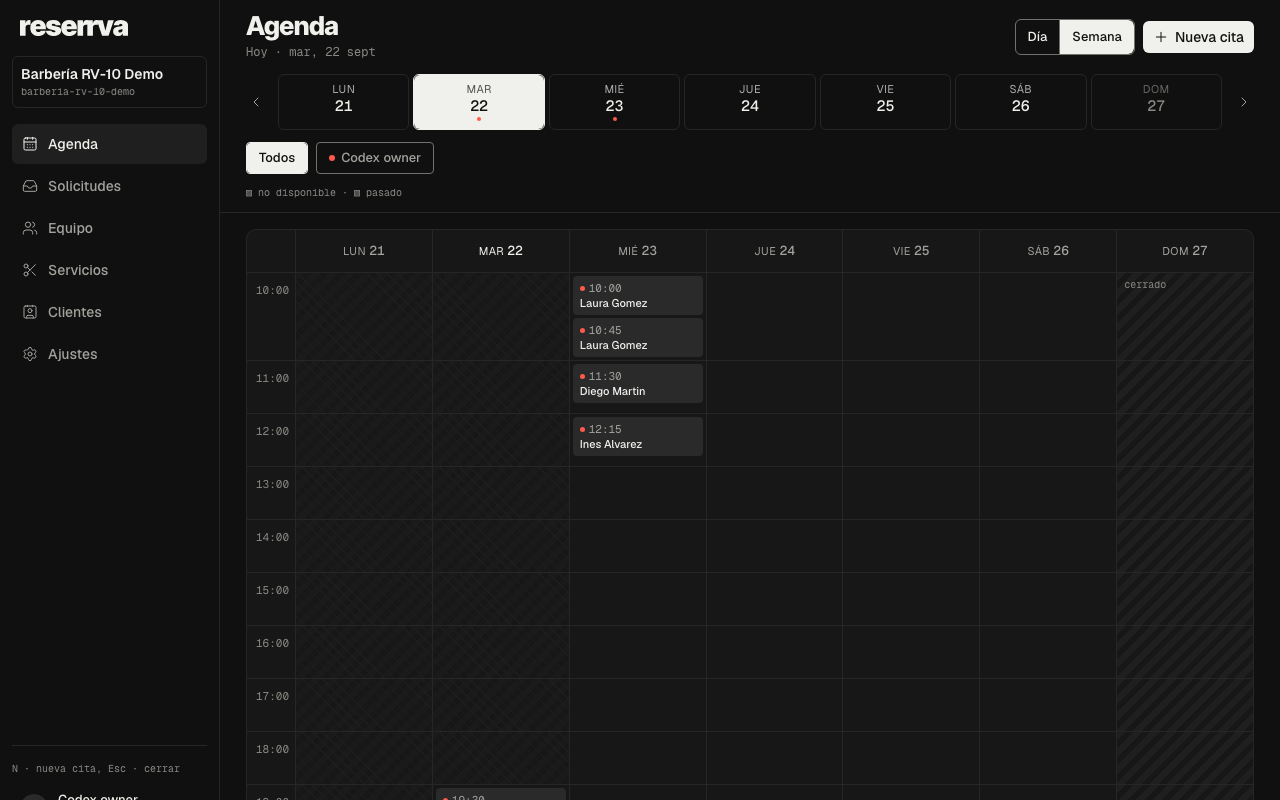
For the business, the agenda is where online bookings and appointments you add yourself come together. Switch between day and week views and use the professional filters to focus on the schedule you need.
If someone books by phone or at the counter, add the appointment through New appointment or an available space in the agenda. Keeping those bookings in the same place gives the online flow an accurate picture of what's already taken.
Use Services when your menu changes. You can create a service, edit its details or remove it from the offer. A service with future appointments may be hidden instead of erased, preserving the bookings that already depend on it. Editing today's catalogue doesn't rewrite the agreed service details on past appointments.
Use Team for invitations and professional management, and your professional profile to update your public information. What each person can access depends on their role: an invited professional isn't automatically an owner or manager. Some menu entries, including Clients and Settings in this release, are placeholders that show a coming-soon message rather than a complete working section.
This guide focuses on booking and running the agenda. It doesn't assume that automated reminders, online payments or AI-agent workflows are enabled just because they're part of the wider product direction. Follow the options actually available in your account and agree any payment or custom-work requirements with the customer.
6. Before you send the link to everyone
Open the public page on your phone. Look at it as someone who has never visited your shop: is the name recognisable, is the address right and is it obvious which service to choose?
- The address, phone number, opening hours and time zone are correct.
- Public professional names are names customers recognise, not email addresses.
- Services have realistic durations, clear names and the correct prices.
- Each professional has checked which services they offer.
- The business and personal booking links open the expected flow.
- You know where to find a new booking and how to contact its customer.
If you complete a test booking, remember that it is a real appointment: use your own details, check it appears in the agenda and cancel it afterwards. Don't leave test appointments occupying times customers could book.
Once those basics are right, share the link. You can keep adjusting your services and team as the business changes; the point of setup is to give customers an accurate place to book today.
Frequently asked questions
Do customers need a Reserrva account?
No. Customers book in their browser and provide contact details. Business owners and team members sign in to manage their work.
Can I use Reserrva if I work alone?
Yes. Create a one-person barbershop or tattoo studio, include yourself as a bookable professional and share your link. You can invite a team later.
Can I send invitations on WhatsApp?
Yes. Copy or share the invitation link from Team. The recipient must still sign in with the email address the invitation was created for.
Where do I find my booking link after setup?
The business link stays available in the dashboard. A professional's personal booking link is available on their profile.
Does remembering my details save all my appointments?
No. It remembers contact details in that browser. Keep each receipt link in the browser used to book; contact the business if you lose access.
Start by tidying the schedule
Set up your barbershop, load your services and invite your team before you open bookings.
Create my barbershop/en/onboarding?kind=barbershop