Create your booking page in Reserrva
This guide walks through setting up a business in Reserrva as it works today: you sign in, answer six screens (or a single card if your profession works from a calendar) and leave with your booking link. It applies to any activity with appointments: a consultancy, a barbershop, a practice, a photography studio. At the end you check your first booking the way a client would.
Result: a public page at reserrva.app/en/b/your-business with your services, your hours and your name, ready to share.
You need: an email address or a Google account, your business name, your general hours and the name, duration and price of one or two services. About ten minutes.
The screenshots come from a test setup (an online consultancy) made with the current version of Reserrva, in Spanish; the English interface has the same screens. No data belongs to a real client.
Sign in with your email or Google
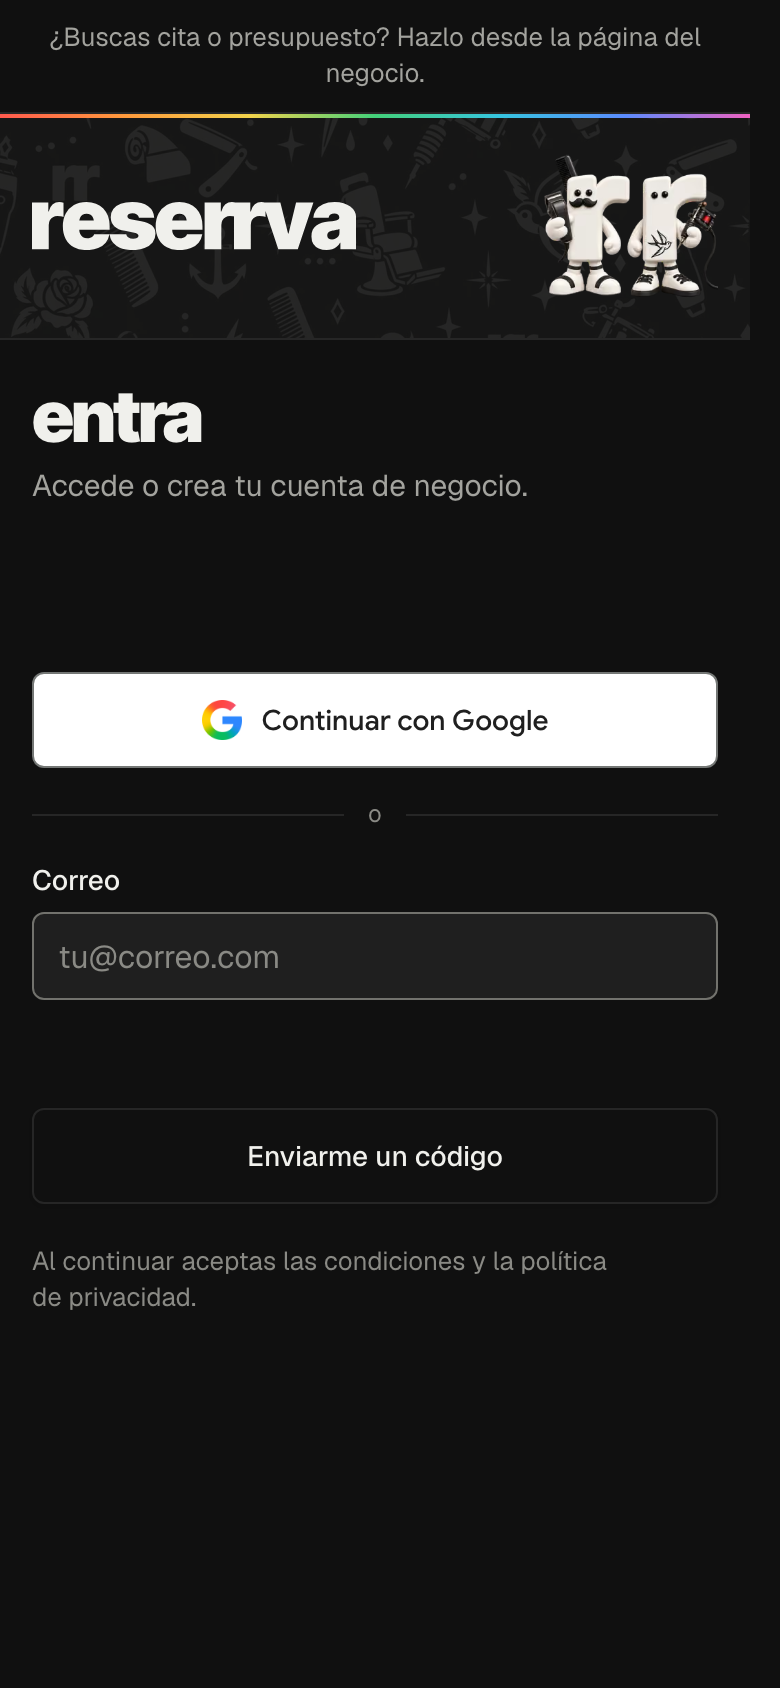
Open reserrva.app/login on your phone or computer. You can continue with Google or type your email and ask for a code: a six-digit number arrives, you type it and you are in. There is no password to remember.
If you do not have a business yet, Reserrva takes you straight to the setup.
Shortcut: the express card
If you pick consulting, software development or coaching, Reserrva does not open the six steps: it opens one card, Here's your page, with what it takes to start right away: your name and photo from Google, your link, your country, your contact email, Monday to Friday 9:00 to 17:00 in your time zone and one 30-minute "Meeting" service, free.
Press Create my page and the page exists. Right after, it offers to connect your Google Calendar, so busy hours are never offered and every meeting gets Meet; you can say "Not now". If you would rather decide everything yourself, Customise opens the six steps below with those same values filled in. Everything can be changed later in Settings.
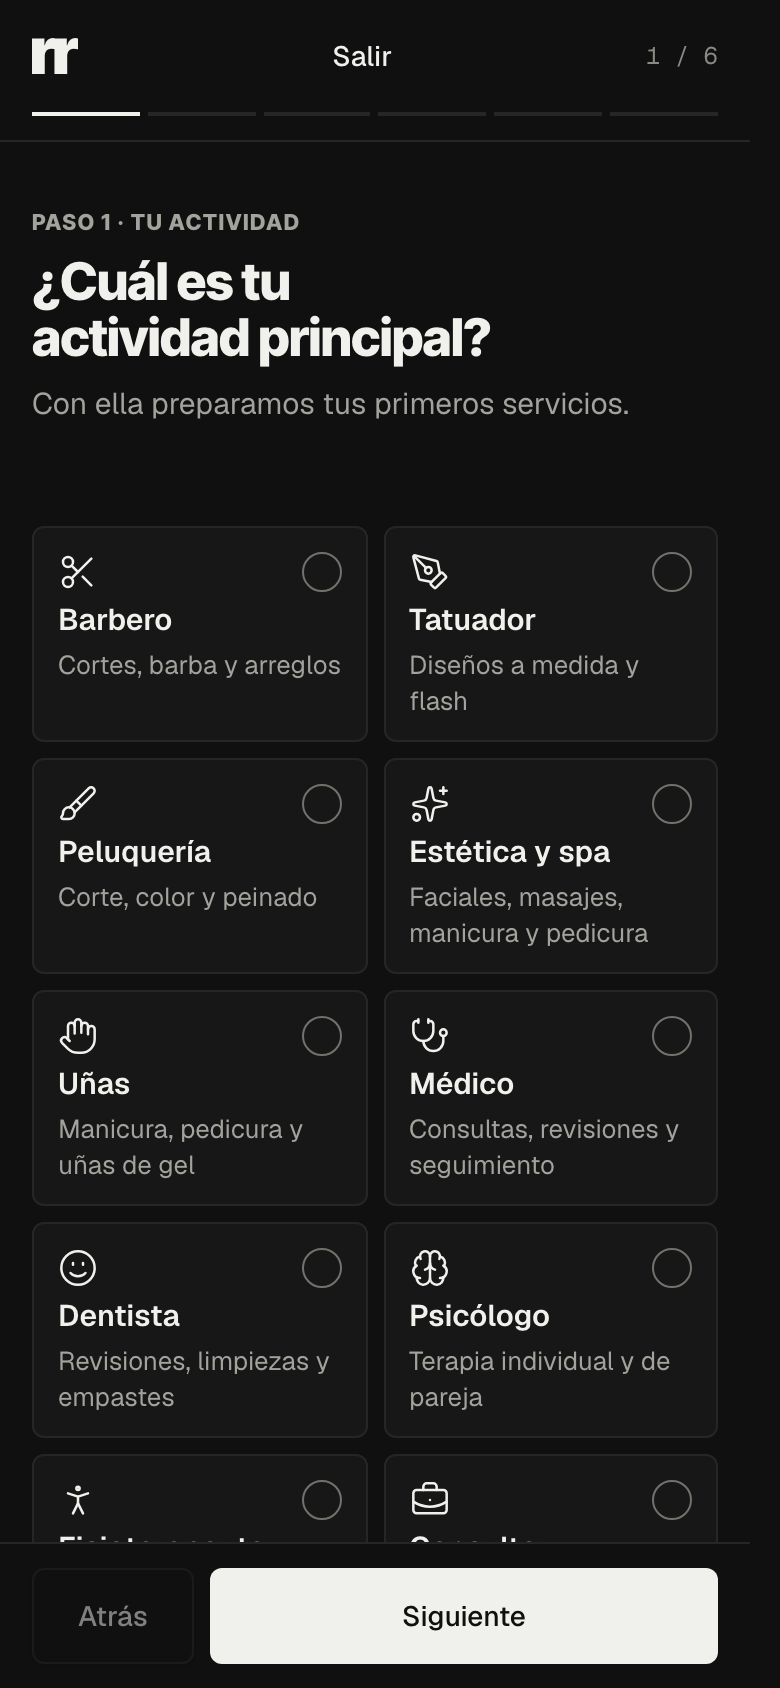
Step 1 · Your profession
Pick your main activity. Reserrva uses it to prepare your first services (a consultant starts with a 30-minute call and a 60-minute session; a barbershop, with cuts, beard and trims) and to decide which contact it asks you for, which mode you start in and how often slots are offered (a service shorter than that interval is offered more often: a 15-minute one, every 15 minutes). If yours is not listed, choose other and write your services in step 5.
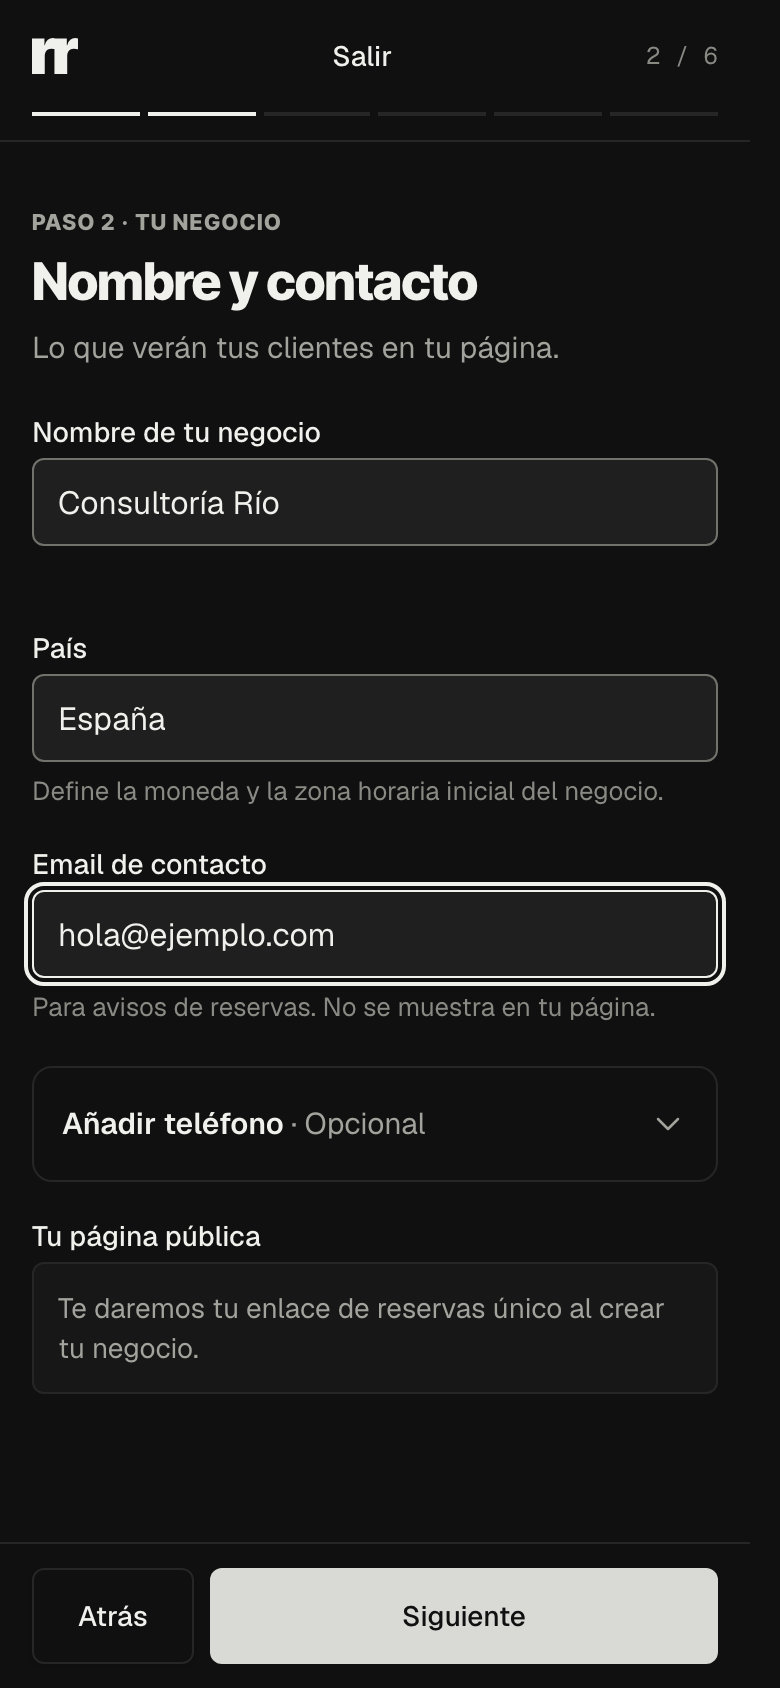
Step 2 · Name and contact
Type your business name and your country: that is what your clients see on your page. The contact depends on the profession you picked in step 1, not on the mode: an in-person profession asks for a phone number, which does appear on your page; a remote one asks for an email address, which is used for booking notices and is not shown publicly.
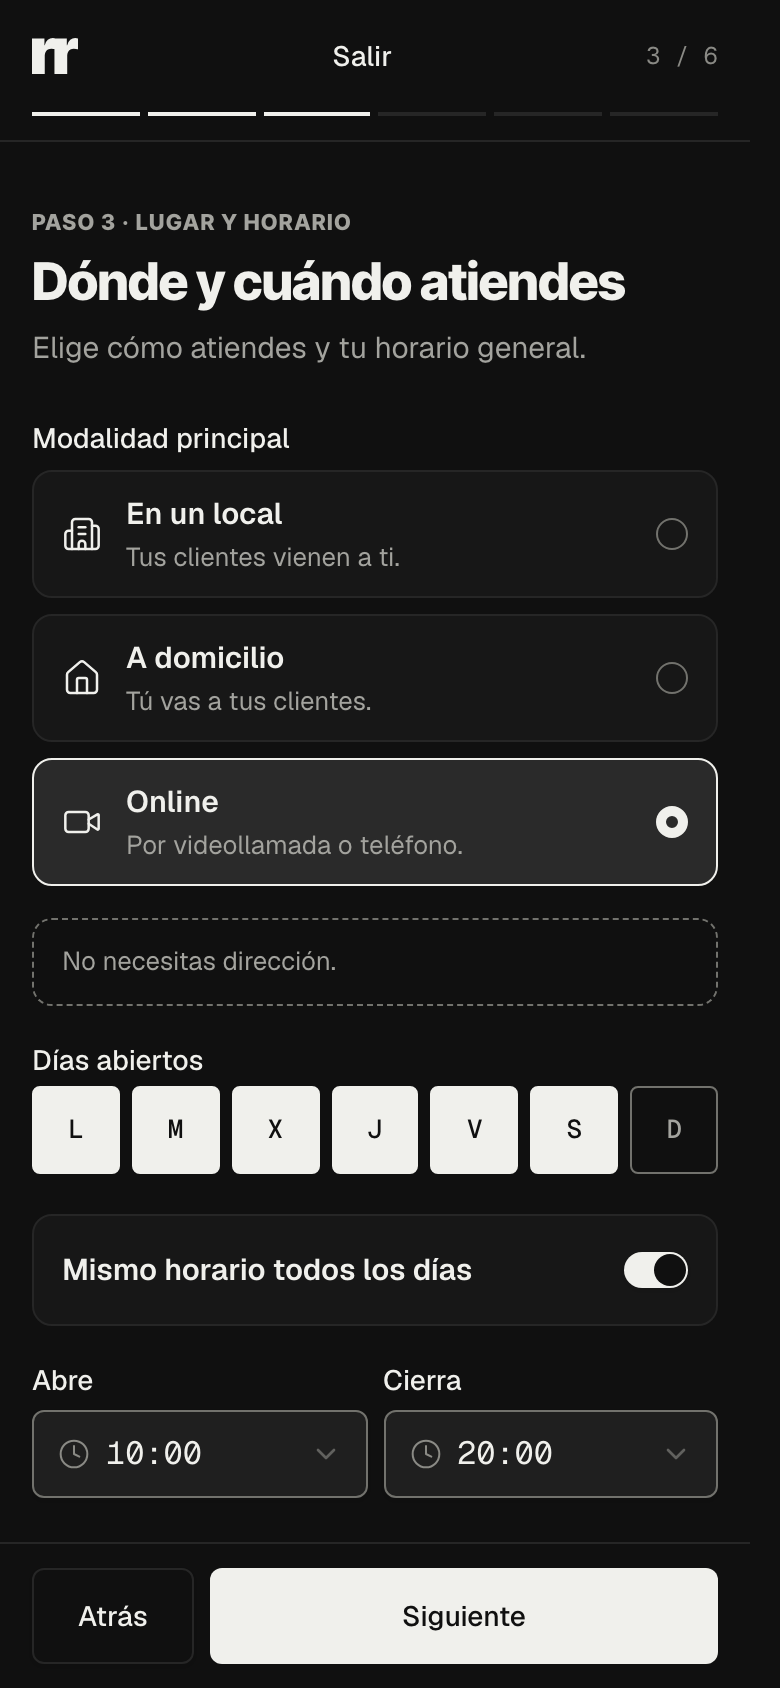
Step 3 · Where and when you work
Choose your main mode: at a venue (clients come to you, and you give the address), at the client's place (you go to them) or online (video call or phone; no address needed).
Below that, mark the days you open and your general hours. If your days differ, turn off Same hours every day and set each one; Add a break reserves lunch or a pause. They are your starting hours for taking bookings; later you change them in Settings → Hours, and each team member's hours in Team.
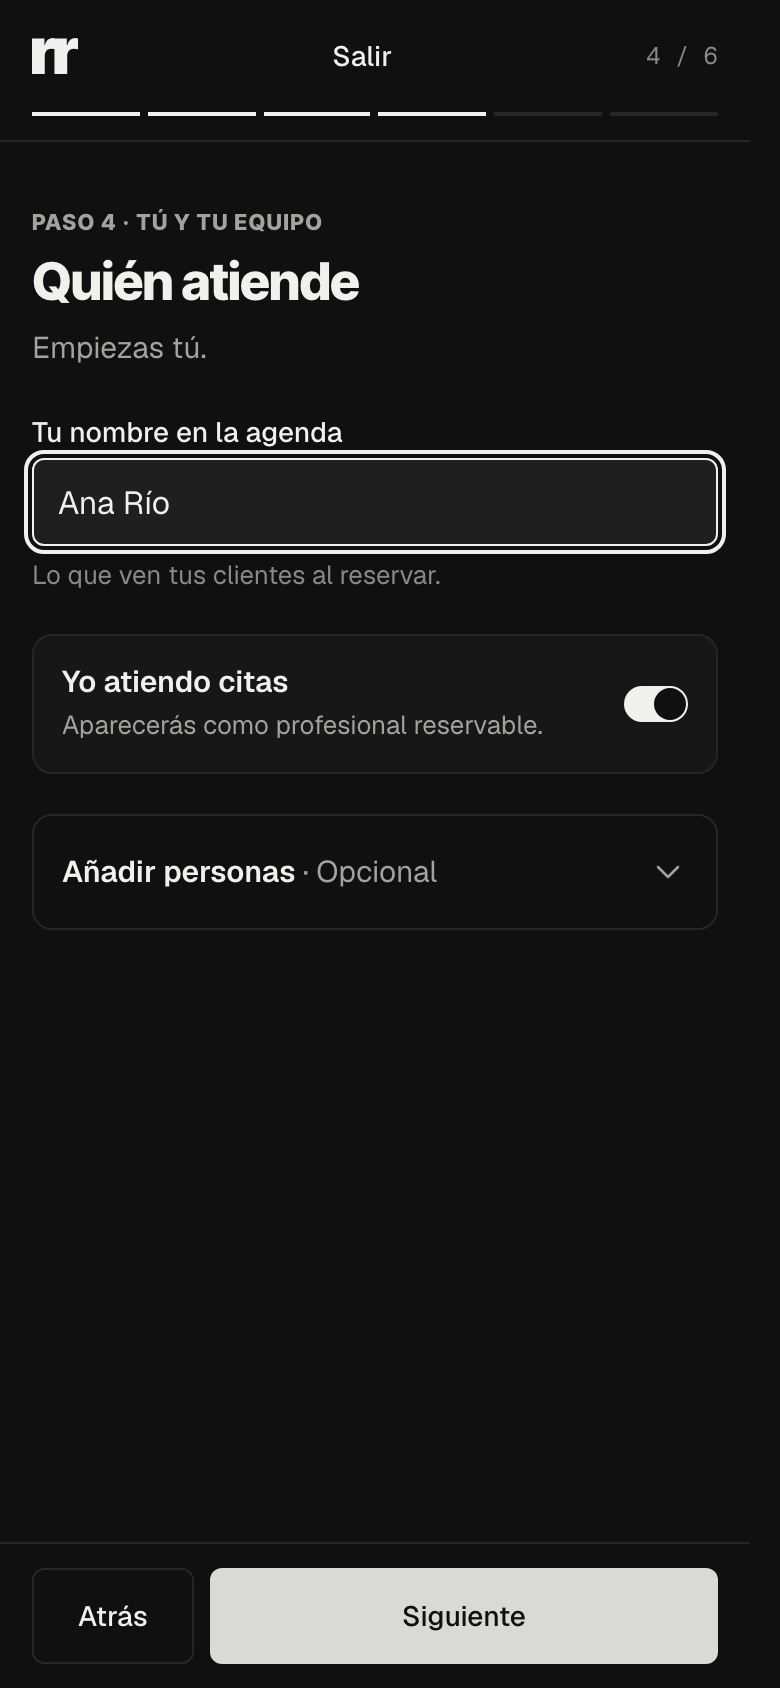
Step 4 · Who takes appointments
You start alone: type your name as you want clients to see it when booking and keep I take appointments on. Adding people is optional and can wait: each person gets an email to open their agenda once you activate the page.
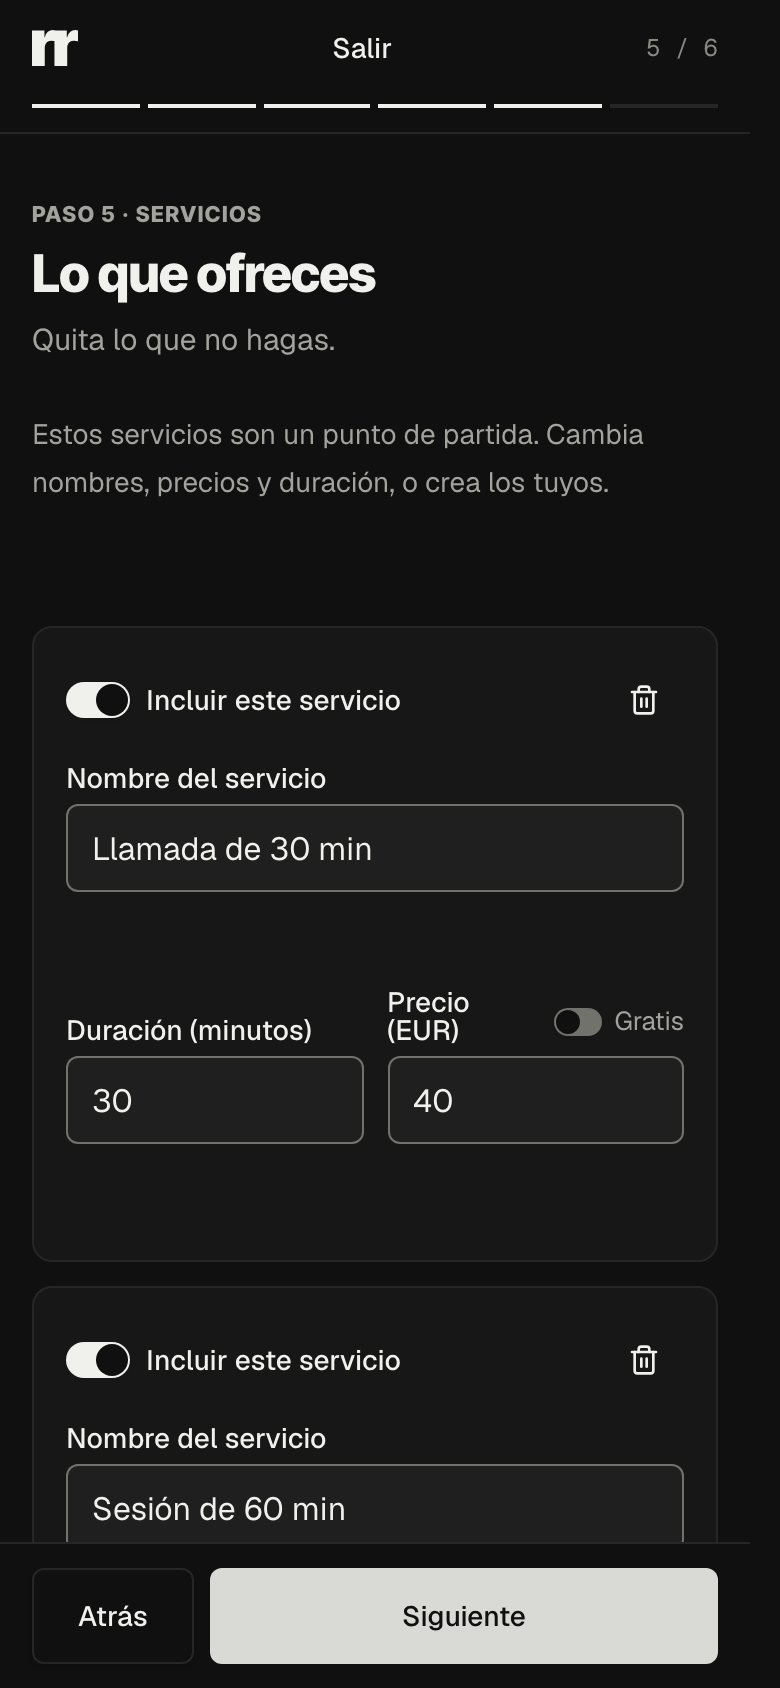
Step 5 · What you offer
Each service has a name, a duration in minutes and a price in your currency, or the Free switch if you do not charge for it. Remove the ones you do not do with each card's switch and add your own with Add service. A service without a price does not let you continue: type the price or mark it free.
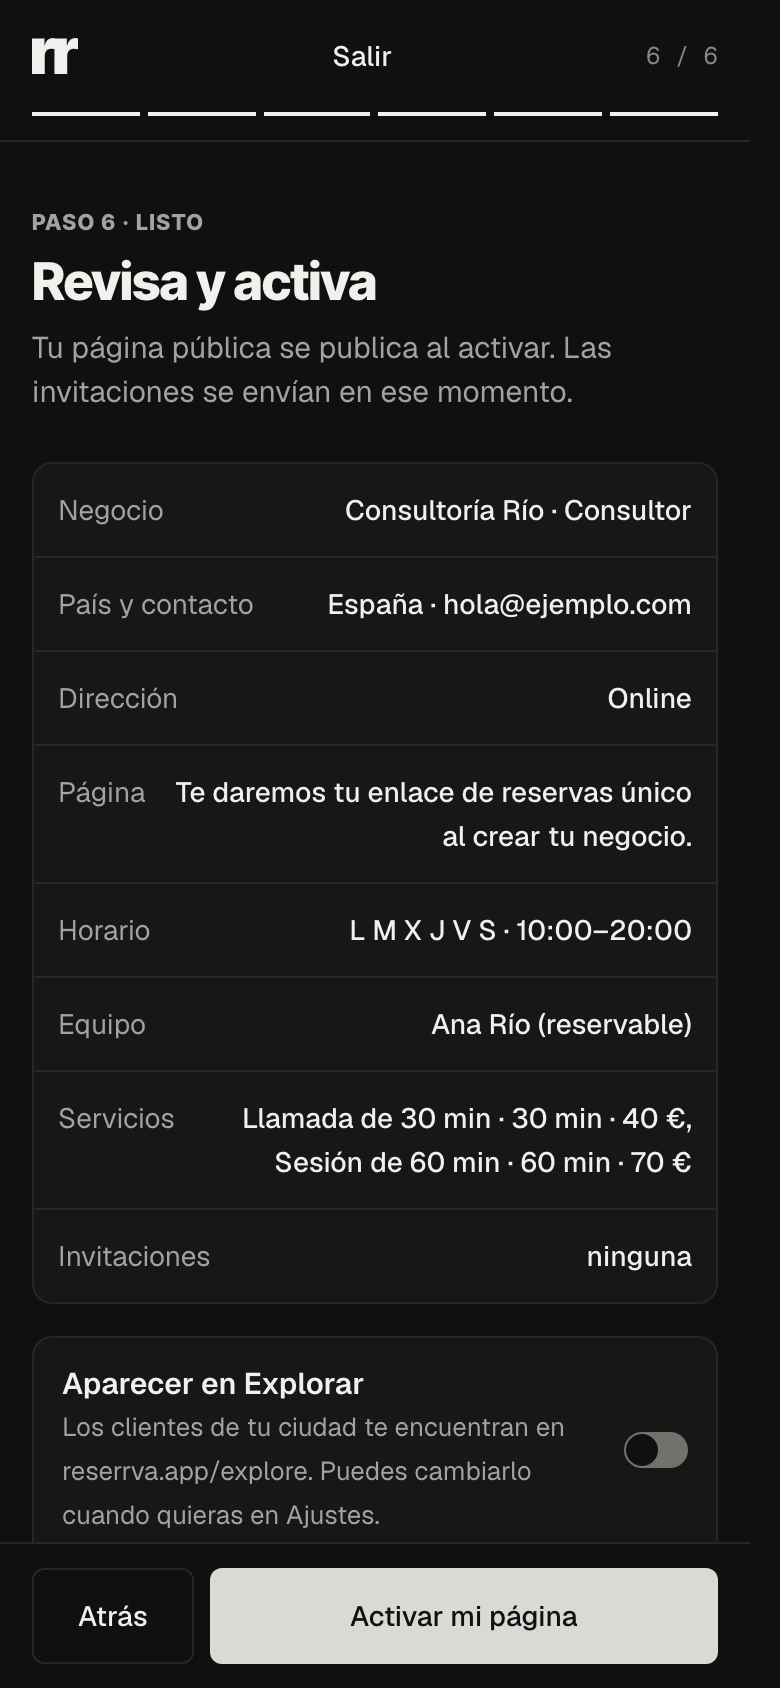
Step 6 · Review and activate
The last screen sums up the business, the contact, the mode, the hours, the team and the services. If something is off, Back goes one step back at a time without losing anything; keep going until you reach the field you want to change.
Decide whether you want to appear in Explore, Reserrva's public directory by city; you can change it any time in Settings. Press Activate my page: your public page goes live at that moment and team invitations are sent. You start on the Solo plan, free for one professional with unlimited bookings; if you want to try Business, there is an optional 14-day trial, no card. Solo is for one professional: if you invited someone in step 4, enable that trial before pressing the button, or remove the invitations.
After activating, Reserrva shows your booking link with buttons to copy or share it. That link always stays in your panel; copy it whenever you need it.
Check your first booking
Open your link on another device, or in a private window, and book the way a client would: pick the service, the professional and a free time, and confirm with your name and the contact your business asks for. No account is needed.
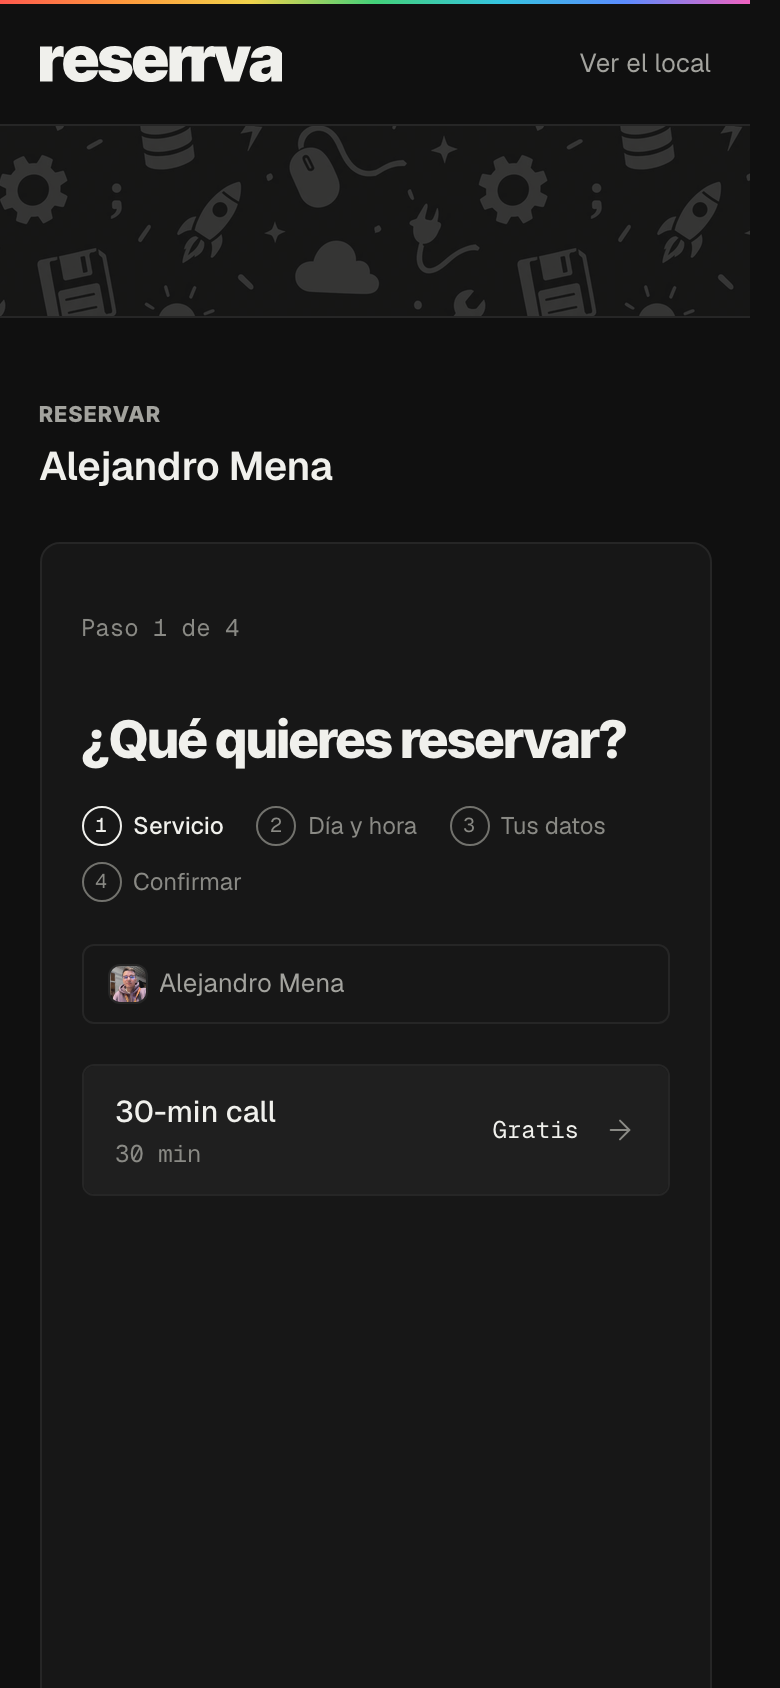
- Your public name and hours are correct; if you added a phone number, check it too.
- Each service has a clear name, a realistic duration and a price (or is marked free).
- The test booking shows up in your agenda at the right time.
- The on-screen confirmation shows the service, the time and your name; for a video-call booking, it also arrives by email.
- You cancelled the test booking from the link in the confirmation, before the cancellation limit.
A test booking is a real appointment: it takes up a time. Cancel it when you are done so it does not block a slot a client could book.
Frequently asked questions
Do my clients need an account?
No. They book from the browser with their name and the contact your business asks for, and get the confirmation on screen.
Can I change my page's link?
Yes. The link is created from your business name and can be changed later from Settings.
What about the services and hours I entered during setup?
They are your starting point. Services, hours, breaks and team are edited from the panel, and changes never rewrite appointments already booked.
How much does it cost?
Solo is free for one professional, with unlimited bookings. For a team or more features there are paid plans, with an optional 14-day Business trial, no card. Your clients never pay to book and Reserrva takes no commission per booking.
Start with your booking page
Set up your business, load your services and share your link before opening the agenda.
Create my booking page/en/onboarding